Down the middle – a happy hunting ground

Observation from this week’s PB sessions. The centre of the court is still proving a happy hunting ground for easy points. Generally, the centre would be the responsibility of the player with their forehand in the middle. So, assuming 2 righthanders, the player on the left of the court would have the main responsibility of covering the centre. However, if the left-hand court player is pulled wide the righthand court player should move across to cover the middle with their backhand. This is the basic principle of following the ball and moving laterally as a unit. It’s only a guideline but it is normal in tournament play for the stronger (and in our case possibly the more mobile) player to take the left-hand court as, with their forehand in the centre, they cover about 60% of the court. Dragging that player wide is a good strategy as the centre is then covered by their partner’s backhand.

You could think about dinking battles as an illustration. Dinks to the middle would normally be dealt with by the player with their forehand in the middle. Dinking wide to their backhand will mean the middle has to be covered by their partner who has to deal with a dink to the centre with their back hand. Advantage us! Most players’ backhands are less reliable that their forehand and more likely to dink into the net or pop the ball up to attack. Often, certainly at our level, they don’t get across to cover the middle anyway and leave the centre open for an easy point. And if nothing else we’ve got them moving, playing on their backhands and outside their comfort zone. Who knew dinking could be such fun!

PS. If a pair have a right-hander and a left-hander they would normally play both forehands down the middle. So if you are playing against them, all wide and down the line shots would go to their backhands. Worth remembering but wide and down the line shots have a higher risk of going out. The centre can still be profitable if they are not good at communication!

PPS.  A pair with two left handers  would normally play the same as two righthanders as described above. The stronger/more mobile player with their forehand down the middle but in the right-hand court.

Top spin serve

Try this the next time you play. A deep heavy topspin lob serve. The top spin helps to bring the ball down into the court. It looks like a slow serve but can catch the receiver out as it kicks up on bouncing. This can jam them up, put them back on their heels. It can produce a weak half court return and inhibit their progress to the kitchen line. Worth a try.

If you want to practice this or any other serve you could agree with your partner and opposing pair to allow 2 serves for a game so you can go for it on the first serve but have a second serve if necessary.

Prepare to drop, look to drive

This is a continuation of the last post about getting to the kitchen and is more-or-less a summary. The third shot of any rally is when the serving side plays their second shot after serving, the one where they must stay back and allow the ball to bounce before playing it. Assuming the return of serve is deep to the baseline, normally this third shot will be a drop, a fairly soft shot lifted so it apexes before the net and drops down into the opponent’s kitchen. This enables the serving pair to makes some progress to their kitchen.

So the serving side should assume the return of serve will be deep and they will be playing a drop shot. However, sometimes the return of serve falls short of the baseline  and may fall half or three quarter court. When this happens the serving side has to move forward to the ball and has the option of a) playing a drop as planned (although easier as they are nearer the net) or driving the ball low over the net at pace. Either way the shorter return of serve means the serving side have been given the momentum to move up.

Driving at the pair at the net from mid court gives then little time to react and control their next shot and may produce a pop up to attack. The reason it is not advisable to  drive the third shot from the back of the court is that a good pair at the net with soft hands could just block the ball back into your kitchen. Starting from the back of the court, this will be a difficult shot to get to and control.

In summary, the serving side should be prepared to play their second shot with a drop  but look for a short return of serve which they may be able to attack. In any game situation the shot you will play will depend on the merits of the ball you are receiving and your perception of the skill level of your opponents.


Get to the kitchen line?

We are constantly told by coaches to get to the kitchen line as soon as possible. This is generally good advice. The dominant court position is up at the NVZ line and depending on the skill levels of the competing pairs, the majority of rallies are won from that position. The problem is that the advice can be translated into ‘get to the kitchen line at all costs’. This leads to players running like lemmings to the cliff edge, often with similar consequences. The advice is probably so frequently drilled into players because many beginners and lower intermediates seem very reluctant to go anywhere near the kitchen and often give away easy points by hanging back and leaving large gaps for short and cross court winners.

It is important to recognise that you can’t always get to the kitchen line in one go. This advice is aimed particularly at the serving pair. Normally you would expect the receiving pair to be at their kitchen line already. The receiver’s partner is there from the start and the service receiver will generally play a return deep to the opposing baseline to pin the serving pair at the back of the court and have sufficient time to join their partner at the kitchen.

This is why, for the servings side, there is a great deal of emphasis on the third shot drop. The first shot is the serve, the second shot is the (usually deep) return of serve, the third shot is played by the serving side (usually from the back of the court). By now their opponents will be at their NVZ. The point of the the serving side playing a drop shot at this point is that the ball should land in the kitchen or at least be below net height before it can be volleyed.

What happens next will depend on how good a drop shot it was. It may allow the serving team to get right up to their kitchen, neutralising the advantageous position of the receiving side and initiating a dinking rally. It may be a poor drop and can be attacked with a volley above net  height. If so, staying back to defend is likely to be the best option. Or it may be legally volleyed back firmly from at or just below net height and you may have made some progress into the mid court transition zone. One response to this may be to play another drop shot (which is likely to be easier to play since you are closer to the net) and resume your advance to the kitchen line.

The message here is that it is good to be able to play drops shots (sometimes referred to as resets) from anywhere on the court. And this may often mean playing awkward shots from around your feet. The only way to improve your short game is practice, doing drills or doing conditioned games that focus on these shots. You can of course practice these shots in recreational and social play. Just tell your partner what you are doing and why.

Finally, you don’t have to play a third shot drop all the time. A drive down the middle can win a rally or get a weak return against a pair who are not well organised and tend to leave a yawning gap down the middle of the court. Or a drive at the body of your opponent whose reactions are a bit suspect or are holding their paddle too low. Straight at their backhand shoulder can be particularly effective!. If the service receiver is a bit slow coming to the net, hitting the ball back to their feet while they are on the move can reap dividends. And you can’t beat a good lob used sparingly enough to be a surprise.

Rule change for 2024

Carries or scoop shots are no longer allowed, so these are now faults and lose the rally. In my squash days this was described as an egg and spoon! However, unlike I think every other racket game, double hits are still not faults in pickleball as long as both contacts with the paddle are in the smooth execution of the same stroke and unintentional. I’ve notice that some if not most of us occasionally have double hits. In my case it is usually because I haven’t middled the shot and the ball clips the guard strip. This is almost impossible to do deliberately and doesn’t seem to make any difference to the shot. If it is one continuous stroke – no fault.

Observations from a matchplay session

At a Heaton matchplay session on December the 20th I saw a number of recurring errors worth mentioning that we all make from time to time when serving or receiving serve.  When your partner is serving, as we know, you need to stay back in the court to allow the second bounce. Too often we stand a couple of feet inside the court. This invites the returner of the serve to drive the ball back to your feet. You either have to play a half volley around your ankles or, even more difficult, play it while back pedaling.  Either way, the returner of the serve has the opportunity to advance to the kitchen in anticipation of a week shot from you. So stand back on or behind the service line when you partner is serving. If you have to move forward to get to a short return of serve (easier than back pedalling to play a shot) you are moving in the right direction for your momentum to take you towards your kitchen line. In particular, you have an opportunity to attack the incoming service returner.

Some of the players were trying to return serves with a heavily spun or fast low drive. Nothing wrong with the idea but risky if not executed well. Trying to spin excessively (i.e. lots of wrist, exaggerated arm movement) risks losing both power and direction. It can be particularly difficult is the serve is fast, low and sliced. Your return can quite easily go into the net or drift out. It will often land three-quarter court so brings your opponent forward when ideally a return of serve should generally be deep to the baseline to keep them back while you advance to the kitchen. The depth of the return of serve is generally more advantageous than speed or spin. In fact a medium paced or even slow return that lands close to the server’s baseline can be the most effective return of serve as it gives you plenty of time to move up the court and join your partner at the kitchen where, of course, he should already be!

Dink drill

Dinking is a very important part of the game, especially at the intermediate level and above. At the highest level it is not unusual to see dinking rallies of 10 or more, often many more, These are very tactical, The idea is that your opponent has to be hit the ball below net height, making it difficult to attack. Ideally your opponent will need to step into the kitchen to play the ball after the bounce. If they are able to reach in and volley, the lower the ball and closer to their feet the better.

Variation 1. The drill requires two players, the ‘coach’ and the ‘student’ The coach initiates the drill by dinking to the feet of the student. The student dinks the ball back to the coach. After playing the dink the student should stay in the same position. The coach will then play a dink to on to the student’s backhand. The student dinks back to the coach who has not moved. The coach then dinks to the student’s back hand for the second time.. Assuming a right-handed student this requires the student to move further to their left who then dinks back to the coach who has remained in their initial position. The coach then dinks again to the student’s backhand who, for the third time dinks back to the still unmoved coach.

At this point the coach is in their starting position and the student is 3 steps to their left. The coach’s next dink, their fourth, is played to the student’s forehand. The student dinks back to the coach.The coach’s fifth and sixth dink is again to the student’s forehand. The student continues to dink back to the coach. After the coach’s sixth dink  the student is back at the starting position directly opposite the coach who has not moved throughout the drill.

The drill can be repeated as often as required. It can be made competitive by a point being scored every time the rally breaks down. Note: the coach stays in the original position throughout. The student,after playing a return dink to the coach, should stay in that position in anticipation of where they know the next dink will be played to.

Variation 2. This drill is the same as above but this time the coach moves along the net to mirror the position of the student. Instead of staying in the same position as above, the coach will move along the net to be directly opposite the student as they return the dinks. The student plays a dink back to the coach who is now directly opposite them. This means the drill is comprised of the coach and student moving up and down the net together, 3 dinks to the student’s backhand and 3 dinks to the student’s forehands.

Video. How to dink consistently

Drop shot drill

The drop shot, where the ball dips over the net and lands in the kitchen or near the kitchen line, is one of the most important and powerful shots in pickleball. Your opponent has to play the ball below net height and lift the ball rather than try to attack it. The drop shot can be played from anywhere in the court and for a variety of purposes. It can be played against pairs that are slow to get to their kitchen. It can be used to reset a rally when you are being attacked and driven back. And, of course, a dink from your kitchen line is a drop shot. It is also a common shot played by experienced players when they are the serving team. Having served, they have to stay back to allow the bounce of the return of serve before they can play their second shot (which is the third shot of the rally). The so-called third shot drop.

This drill practices drop shots from different positions on court, specifically in order to advance from the back of the court, through the transition zone and up to the NVZ line. This requires 2 players. Player number 1 stands at their kitchen line and acts as the feeder. They feed player number 2, the ‘student’ who starts at their baseline.  These roles are reversed at some point, after so many feeds or so many minutes. This drill can be played down one half of a court so 2 pairs can drill on the court at the same time. It could make part of a good warmup for instance.

To start the drill the player 1 stands near their kitchen line and hits a friendly shot to player 2 who is at the back of the court. Player 2 plays the ball after the bounce and lifts the ball to fall short in or near player 1’s kitchen. The ball doesn’t have to land in the kitchen but ideally should be short enough to make player1 play the next feed from below net height. Player 2 should advance up the transition area to play the second feed that should be another friendly shot back to them. Player 2 then plays a second drop shot (which should be easier as they are closer to the net) and continues to move up to their kitchen line. Having arrived at the kitchen line the rally is completed with a dinking dual. It may take more than 2 drops to get to the kitchen line. Playing 2 drops is quite usual.

A couple of things to remember. When you have to play a shot in the transition zone, pause your forward movement so you are stable when you hit your shot. This is likely to be below knee height and around you feet. It is hard to control shots from there if you are moving. You should also keep your paddle low. Ideally you play a lifted shot that reaches its apex before the net so that it is dropping as it goes over. (See the diagram at the end of this post on controlling the apex of your shot).

Both player 1 (the feed) and player 2 (the drop shot) can volley if the opportunity arises but should keep to the pattern of the drill. Depending on your position on the court and the shot you are receiving you should be able to play drop shots from anywhere on the court. None of this is easy to begin with. That’s why drills like this are useful. Repartition and grooving are the key.

https://oceansidepickleball.wordpress.com/2020/04/25/pallots-pandemic-pickleball-performance-post-5/

Notice that the further back in the court you aret, the higher the apex and the further from the net it has to be. It’s all about pace and height. For instance, playing drop shots from near your baseline, you need more height and the apex will be around your own kitchen line. When you are at your kitchen line, the apex is low and just above the net.

Note on the 3rd shot drop. The drop shot is the favoured 3rd shot in a rally, i.e. the serving team’s 2nd shot that is typically played from at or near their baseline while the opposing pair are already at their kitchen line. A good 3rd shot drop allows the serving team to get to their kitchen line or at least make progress towards it. However, it is a difficult shot to play reliably and can go very wrong! This is why it is rarely seen in beginner games and relatively infrequently in intermediate play where it is more usual to drive the 3rd shot.

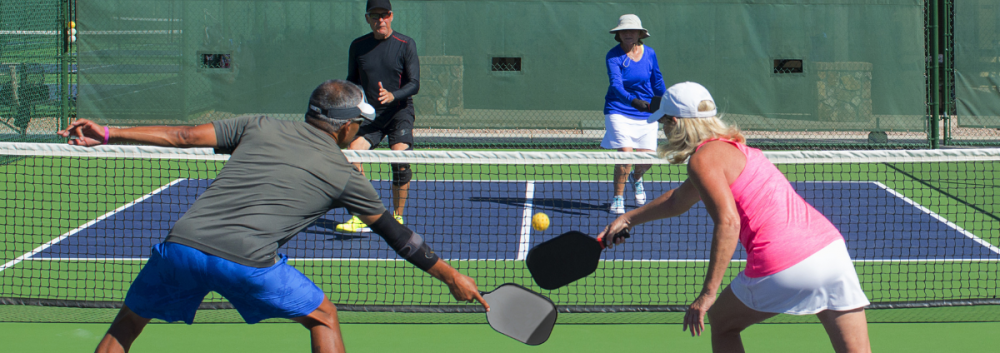
Don’t play in no man’s land

The zone of transition is often referred to as no man’s land for a reason. It can be very dangerous! It’s an area of the court you pass through on your way to the kitchen line or the baseline. While you are in no man’s land you are vulnerable to attack by the opposition. You need to get out as soon as possible. However, inevitably there will be times when you will have to play shots from there, particularly drop shots, passing shots down the middle or down the line, and occasionally lobs. But these often have to be played round your feet or as a reaction shot, both of which can be difficult to control.  Play it as best you can and, depending on what shot it is, move either to the NVZ line or back to the baseline. If it is a good drop shot (the usual shot to play when trying to move up the transition area), or a good lob, move up. If it’s a high shot that can be attacked, more often than not you are better off dropping back keeping your paddle low  anticipating a shot around your feet. If the ball comes rocketing at you at chest height, it’s going out so get out of the way! Be sure you and your partner advance or drop back together (see playing doubles as a unit) or you are giving your opponents some inviting targets to hit into.

Quite often you won’t be able to get from the back of the court to the NVZ line in one move and have to play 2 or more shots to advance to the kitchen. While moving in the transition zone, just before your opponent hits the ball, stop moving, stabilize in the ready position. Have your feet shoulder width apart with one foot slightly forward of the other to help push off forwards or backwards as necessary, and raise a little on to your toes. Hold your paddle in the ready position and you are giving yourself the best chance to deal with anything that comes your way. If you play a good drop from there you can continue forward to the NVZ line.